Step 1: Accessing the WordPress Dashboard
To begin, log in to your WordPress website using your credentials. Normally, this is the domain of your website, followed by /wp-admin. For example www.mywebsite.com/wp-admin.
Once logged in, you will be directed to the WordPress dashboard, the central control panel for managing your site’s content.
Step 2: Navigating to the Posts Section
On the left-hand side of the dashboard, locate the menu and click on “Posts.” This action will expand the options related to posts, such as “All Posts,” “Add New,” “Categories,” and “Tags.”
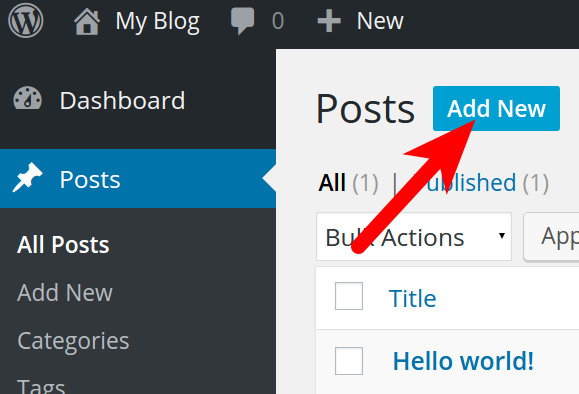
Step 3: Click on “Add New”
To create a new post, select the “Add New” option from the expanded menu in the Posts section. By doing so, you will be directed to the post editor interface.
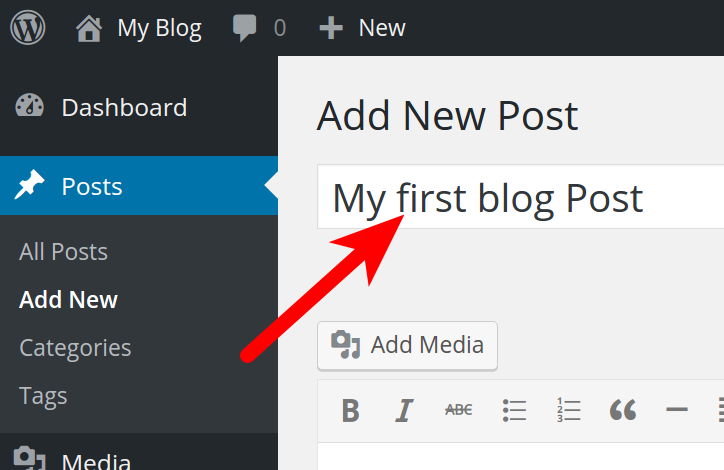
Step 4: Enter the Post Title
At the top of the post editor page, you’ll find a field to enter the title of your post. Click on the space provided and enter a catchy and descriptive title that accurately reflects the content of your post.
Step 5: Compose the Post Content
The main section of the post editor is where you’ll compose your content. The editor provides a range of formatting options, similar to a word processor, allowing you to customize your text, insert images, videos, and more. You can use the formatting toolbar above the editor to adjust the font, size, alignment, and create headings, lists, and links.

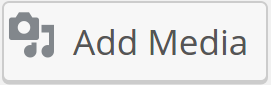
Step 6: Add Media
To enhance your post, you can include images, videos, or other media elements. Click on the “+” button in the top-left corner of the editor to access the media library. From there, you can upload new files or select existing ones from your library.
Step 7: Set Featured Image (Optional)
A featured image is the thumbnail image that represents your post in various parts of your website, including the homepage or archives. To set a featured image, locate the “Featured Image” panel on the right-hand side of the editor and click on the “Set featured image” link. You can upload a new image or choose from your media library.

Step 8: Configure Post Settings
Scrolling down the post editor page, you will find several additional settings to configure. These settings include categories, tags, publishing options, and more. Categories and tags help organize your posts and improve navigation on your website. You can assign your post to relevant categories and add tags to make it easier for users to find related content.
Step 9: Preview and Publish
Once you have completed writing and formatting your post, it’s crucial to preview your content before publishing. To preview, click on the “Preview” button located on the top right of the editor. This allows you to see how your post will appear to readers. If everything looks good, click on the “Publish” button to make your post live.

Conclusion:
Creating a WordPress post is a straightforward process that allows you to share your thoughts, ideas, and valuable content with your audience.
Stuck? Need help? Contact me today for guidance.